Thursday, November 30, 2017

Dashing Through the Snow

Hello Sweet 'n Sassy Stampers!
It's Ceal, here to share a Christmas card using the super cute set, Holiday Hugs.
To create my card I started with a top folding note card and a piece of copy paper that I cut to make a mask for the snow. To make the snow drifts I used Broken China distress ink and a sponge. 
I stamped the image on the card front and also on a scrap piece of card stock and colored it with Copic markers and then fussy cut it out and placed it on top of the stamped image.


To finish the card I added the greeting plus a little shimmer (hard to see in the picture) on his hat.


Wednesday, November 29, 2017

Snuggly Winter Wishes

Hello friends!  Can you believe that there are only two days remaining this month and that means the end of the Sweet 'n Sassy Stamps 10th Birthday Celebration is coming to an end as well.  We have two more popular stamp sets to give away and then the drawing of the grand prize....a free stamp set of the winner's choice each month for an entire year...that's 12 free stamp sets!

My sample today features one of the sets we are giving away this week...For the Birds.

Two of the adorable birds from the For the Birds stamp set were colored with Copic Markers to look like a cardinal and a bluebird.  A Splash Watercolor Background using Oxide inks was created on the circle behind the birds.  Snowdrifts were sponged on the card front and the panel embossed with a Texture Fade embossing folder.  A faux wood strip created by applying Oxide inks directly to the paper was added to the right side of the card.   The sentiment was embossed and a few sequins added to finish the card.  Today's sketch from Splitcoaststampers was used for the design of the card.

Be sure to check out the Sweet 'n Sassy Stamps Store to find out how you can win the 


Thanks so much for stopping by...good luck and happy shopping!

Hugs,
Cathy

Tuesday, November 28, 2017

Warm Winter Hugs

Hello Sweet Friends!  Julie here and today I am sharing a fun winter card with the For the Birds Clear Stamp Set (designed by Korin Sutherland).  


This cute stamp set has three different bird images along with the branch and several fun sentiments- it is adorable and perfect for those special winter cards!


To create this card, use a sponge dauber to apply Broken China Distress Oxide Ink to a piece of 4 ¼” x 5 ½” white cardstock and blend in Picked Raspberry Distress Ink towards the top. FYI- I cut a piece of scrap cardstock to use as a mask at the bottom of the panel to create the snow drifts :-)

Once you are satisfied with the blending of the ink, spritz a bit of water to activate the oxide ink and create the illusion of snow.

Stamp the sentiment in the corner with archival black ink, emboss with clear embossing powder and once the powder has cooled, die cut with a rectangle stitched die before mounting onto the embossed white card front.

Stamp the bird and branch images with an archival black ink and emboss with clear embossing powder.  Once the embossing has cooled, watercolor with water-based markers and cut out the images.

Use dimensional foam to mount the birds as well as the branch. Add a bit of shimmer to the snow with a clear glitter pen and a few snowflakes with the Sharpie® Extra Fine Paint Pen.

I had fun creating this cute snowy scene and am so thankful that you took the time to visit us- hugs and God Bless, sweet friends!

Monday, November 27, 2017

Bird Houses

Hello friends, hope you all had a wonderful Thanksgiving with family and friends.  Now it's time to click it into high gear for Christmas!  Do you have your cards all made?   I made this card using the set called Season's Greetings, I just love these little bird houses.  I colored with copics and added some glitter for snow, the paper is from The Paper Studios.  Don't forget about our Birthday celebration going on this month, so many great discounts and freebies to be had, you can find all the information HERE!
~Stephanie

Friday, November 24, 2017

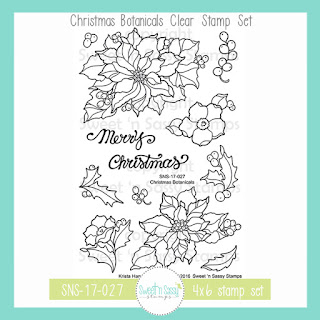
Christmas Botanicals

Hello everyone! The time to prepare for Christmas started ;). So today I'll share this card for Christmas.

When I saw the Christmas Botanicals stamp set I knew I wanted to make a wreath with the flowers and leaves. So that's what I did for this card. Well, a wreath... it's not completely round but I wanted to have the message on my circle diecut too so I just worked around the 'Merry Christmas' sentiment.
To start this card I just drew a circle on some watercolor paper. That way I had a guide for my stamps. I started with the sentiment and stamped everything else around it. I erased the lines from the circle and diecut the panel out of the watercolor paper.
I colored the images with watercolor markers and a waterbrush. I used dark red/purple cardstock with a metallic glow on it. I adhered the diecut panel with foamtape so the wood veneer elements could go behind it. I added a couple of sequins and a white ribbon to finish the card.
http://www.sweetnsassystamps.com/christmas-botanicals-clear-stamp-set/
I used the stamp set 'Christmas Botanicals' for this card.

Have a nice day!
- Lucinde

Wednesday, November 22, 2017

Bought With Love

Hi Everybody, Regina here..... 

I was planning a visit to see my Mother In Law in the hospital and wanted to take something to her so I bought this cute snowman in which you can track the days until Christmas.  I told her she could use it in the meantime to track the number of days until she could come home.  :)


The only bag I could find was plain white with handles. Well that wasn't going to work, so I decorated it simply to look like a snowman to match what I was giving her.  You can add hair, earmuffs, etc.  

I used this stamp set from Sweet 'N Sassy Stamps called Christmas Tag Sentiments.  These sentiments are all so great!  They are a nice size and fun to use.  She always brags about how I make her everything so I love this stamp that says made and scratched out, bought with love. 

Here's what the stamp set looks like


I made two tags.... first  I made this red and green one.  I love how these inks look on this tag.  I used Colorbox Cherry and Jalapeno.  The tag is cute but kind of blended in too much with the white bag so I made another one that looks like chalkboard.  


For the black tag, I used Gina K Designs Black Onyx Cardstock and her white pigment ink.  This ink provides excellent coverage and dries pretty fast. I went around the edge with the white ink and added a few enamel dots from the Eyelet Outlet. The black and white gingham ribbon is also from Gina K Designs. The red and white twine is from We R Memory Keepers. I glued a snowflake from my stash on top of the ribbon and twine to add some sparkle and interest and added some white dots with a Sigmo Uniball White Gel Pen. 


I used Gina K Designs Heavy Base Weight White Cardstock for the other tag, the Colorbox Inks mentioned above, went around edge with the red ink and added a few enamel dots from Eyelet Outlet.  I needed some sparkle so I cut out a few stars from red and green glitter paper using the Star Dies. The beautiful red and white ribbon is from Really Reasonable Ribbon.  They have a monthly ribbon club and put together a beautiful assortment of ribbons that coordinate together.  I used the Christmas Assortment.  I am really impressed with the quality of the ribbon from this company.  

Go ahead and buy the solid color bags with the handles from a dollar store and decorate it yourself.  Another idea I had was to stamp the sentiments all over the bag. Tags make your gift more interesting and they're quick and fun to make.

I hope I inspired you to make some tags for your gifts this year.

For more inspiration, please visit my blog at http://cardsbyregina.blogspot.com

Thank you for stopping by and have a great day!


Regina

Monday, November 20, 2017

Choose Faith


WOW! What a Birthday month this has been at Sweet N Sassy Stamps - amiright? There is so much going on from flash sales to free printables and a free stamp with purchase...If you haven't already, check out the details HERE

Today I went through my stash of backgrounds - you know the ones. You see a fun techniques so you try it but then never do anything with it? PLEASE tell me I am not the only one who does this?? Anyway...I decided to make a set of cards with them. I came up with a layout so they would be similar since the backgrounds would make them so different. I used Sweet N Sassy's Choose Faith Clear Stamp Set for my focal point/sentiments.

I love some of them and I like some of them but overall I am happy with all of them!


Here they are up close...

Faith (I used distress inks drizzled down watercolor paper for this background).

Hope (I used a stencil and Distress Oxide - Iced Spruce on Bristol paper for this background).

Grace (I used distress inks and Wink of Stella on Glossy Card stock TECHNIQUE from SCS then pounced the Grace stamp on it with Versamark for this background).

Joy (I used Neocolor II water color crayons and a water brush on Bristol paper in this background).

OK, now I challenge you to pull out you background pieces and just have fun!! I hope you are inspired!

Thanks for stopping by!
Lyn

Saturday, November 18, 2017

Grow in Grace...

Hello Everyone!  Have you seen the NEW Single Stamps that have been added to the store?  They were originally designed for last years birthday celebration but so many of you requested that they be made available for purchase that Korin has done just that.   I originally planned on just sharing my  Grow In Grace card but loved that they are the perfect size (2" x 3") and create beautiful focal images for quick and easy cards.  I ended up making a couple more...hope you enjoy today's eye candy.


And don't forget about our Birthday Celebration!

   FREE GIFT WITH PURCHASE

Through the entire month of November EVERY $50 order* will also include the “So Happy” stamp set, a $15.95 value, at no additional charge!! No coupon required.

*Order must total $50 after discounts and before tax and shipping.
Thank you so much for Celebrating with us!

Friday, November 17, 2017

wood slice ornaments

Good morning!
 
Today I am sharing some wood slice ornaments. Here I used my Holiday Hugs and Poinsettias & Candles stamp sets along with We Three Kings.
 
The ornaments were stamped with Archival ink and watercolored with Inktense pencils. The first two are from Poinsettias & Candles and We Three Kings.  I added some Wink of Stella to the star, base, and flames on the first one and a tiny rhinestone to the star on the wise men one.
 

The back side of the first two...


The third and fourth use Poinsettias & Candles and Holiday Hugs. More Wink of Stella on the flower centers and snow angel wings.
 
 
The back side of the third and fourth...


Have a great day!
Diane


Thursday, November 16, 2017

Celebrating.....

{janebosi}

I had the joy of attending the wedding of my two friends a couple of weekends ago.  It was a smallish affair and full of joy and promise, just like weddings are supposed to be!  I wanted to do a totally handcrafted gift, mostly because those kinds of gifts were most important to me when I got married about a 1,000 years ago!

This is the card I created to go along with a hand lettered sign that recorded the date their family was established.  I ordered the sign from CreateinHim on Etsy and I love it so much; I'm sure they do too!  I used both So Happy (the free with purchase set!! yay, you!) and Scribble Flowers to create this whimsical water colored card.  I love "painting" and find it to be so relaxing and therapeutic.

I sure hope you are enjoying the Birthday Celebration and finding lots of inspiration!

Be Awesome!  Jane

I got crafty with: 

Tuesday, November 14, 2017

Harvest Blessings

Hello friends, Stephanie sharing with you today.  My first card is using Harvest Blessings, I love this little stamp set and you can get it right now for half price, yep, that is $4.95 folks, hop on over to the store and get yours.  I used watercolors on mine and the paper is from DCWV.
My next card is using stamps from our Free Birthday Celebration stamp set called So Happy and yes, you can get this set free with a $50 purchase.  It is such a versatile little set.    Have you been keeping up with all the excitement so far this month?  10 years is a BIG DEAL!  Make sure you check out the Birthday celebration link HERE and also keep an eye on our Facebook and Instagram pages for all the fun surprises we have for you.